Push Button Debouncing Techniques
When using a tactile switch as an input source, it is common that “button bouncing” happens without any debouncing methods.
In this post, I want to share some experiments I have done for validating the different methods, as well as introduce some online tools.
Test Environment
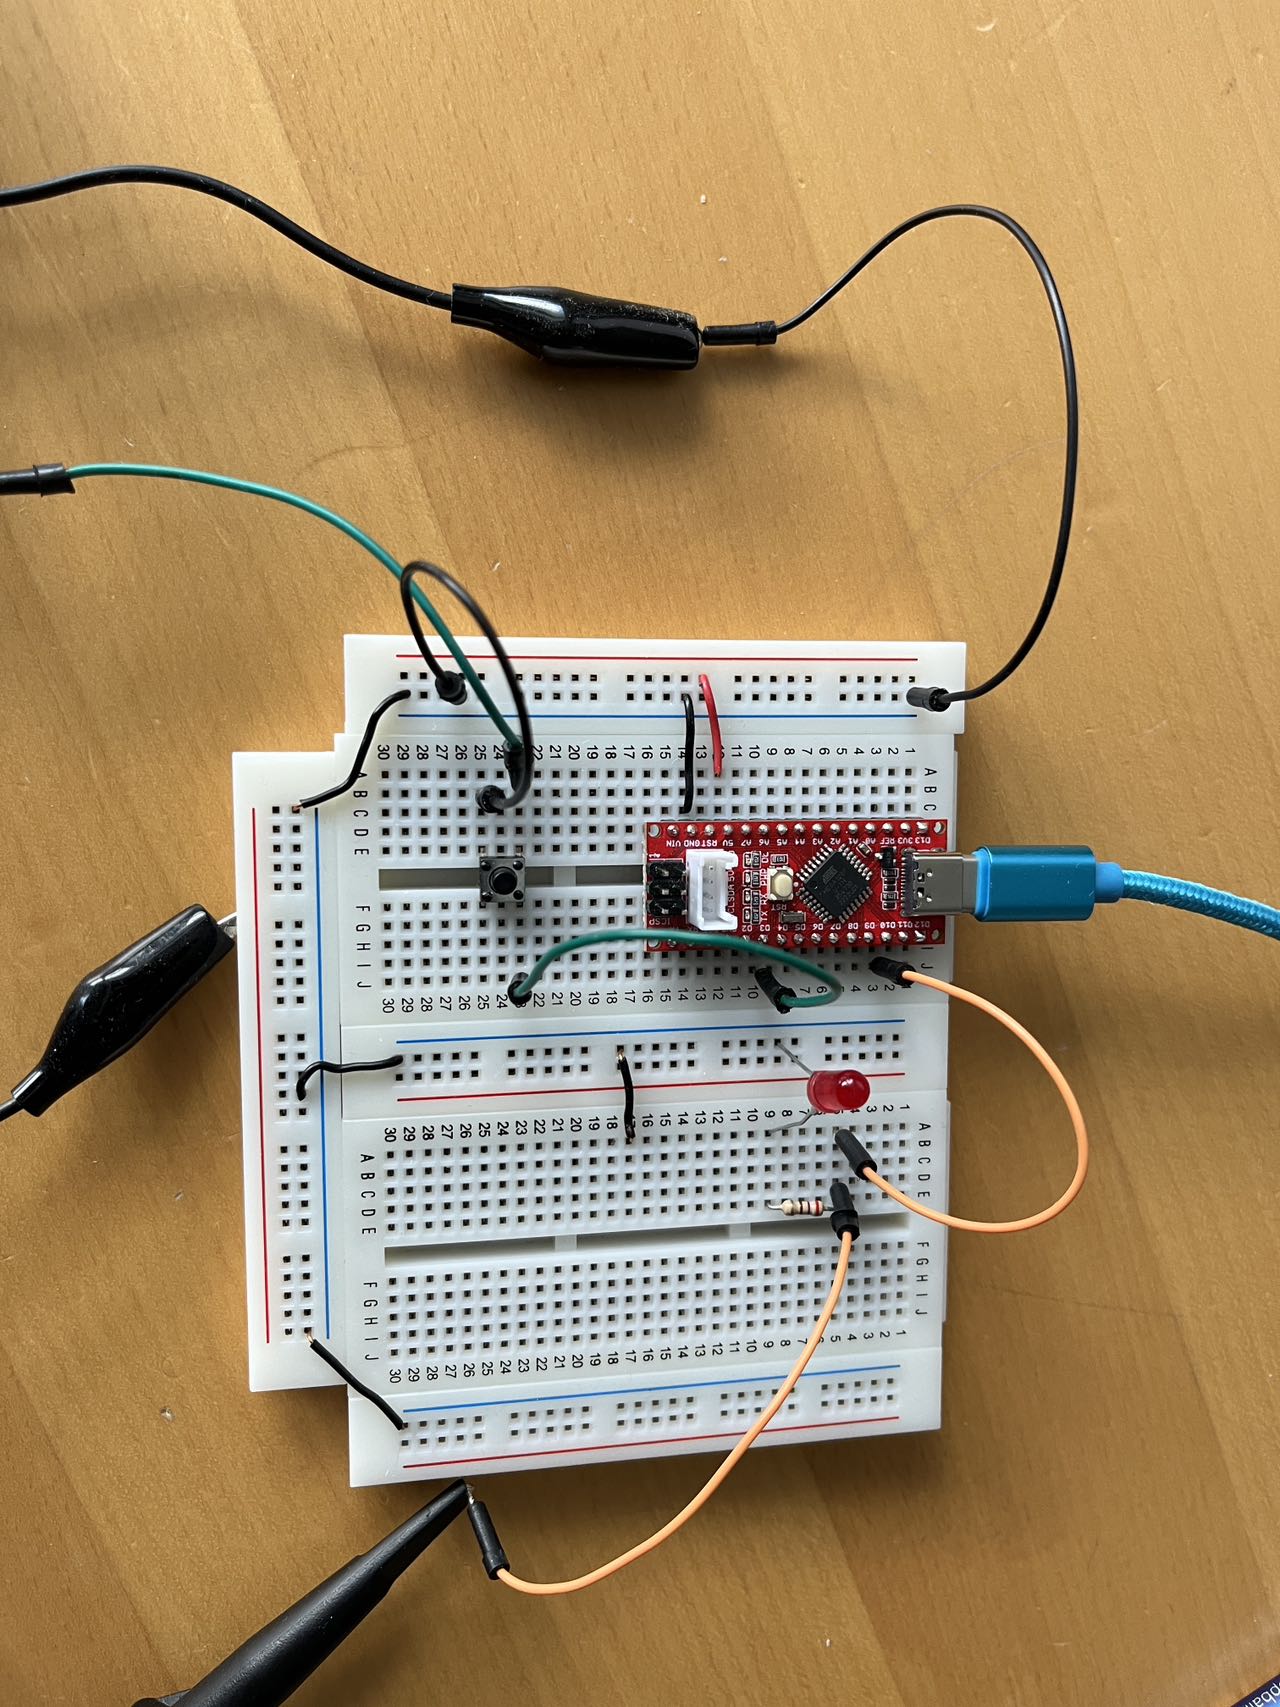
The experiment is performed on a Seeeduino Nao board, where pin D3 is connected to a push button, and a red LED is connected to pin D10 as an indicator. Both signals are monitored by the oscilloscope. Here’s the setup:

And the test code:
/**
 * @file main.cpp
 * @author Zhangshun Lu
 * @brief A simple I/O test. Once the tacticle switch is pressed, the LED will change the state. The example is using interrupt on falling edge to detect button input. The example is tested on Seeeduino Nano board.
 *
 * @version 0.1
 * @date 2024-05-23
 *
 * @copyright Copyright (c) 2024
 *
 */

#include <Arduino.h>

#define PIN_BTN     3
#define PIN_LED_R   10

volatile byte state = LOW;

void blink();

void setup() {
  pinMode(PIN_LED_R, OUTPUT);
  pinMode(PIN_BTN, INPUT_PULLUP);
  attachInterrupt(digitalPinToInterrupt(PIN_BTN), blink, FALLING);

  digitalWrite(PIN_LED_R, LOW);
}

void loop() {
  digitalWrite(PIN_LED_R, state);
}

/**
 * @brief ISR
 *
 */
void blink() {
  state = !state;
}
Hardware Solution: Debouncing using RC Filter Circuit
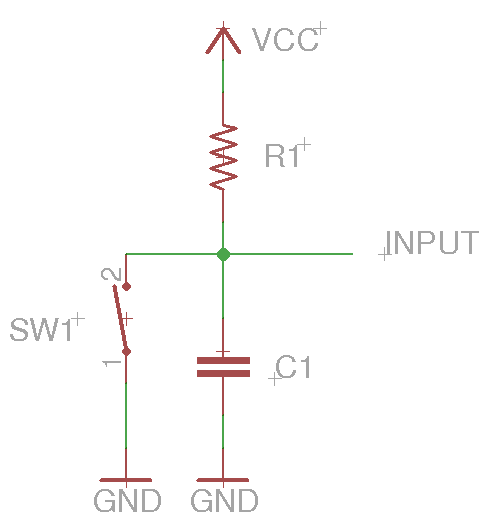
I first tested the RC filter circuit, this method is handy and cost effective.

I use the Debounce calaculator to find out the proper RC value pair. In this experiment, I use 10k for R, and 0.1uF for C.
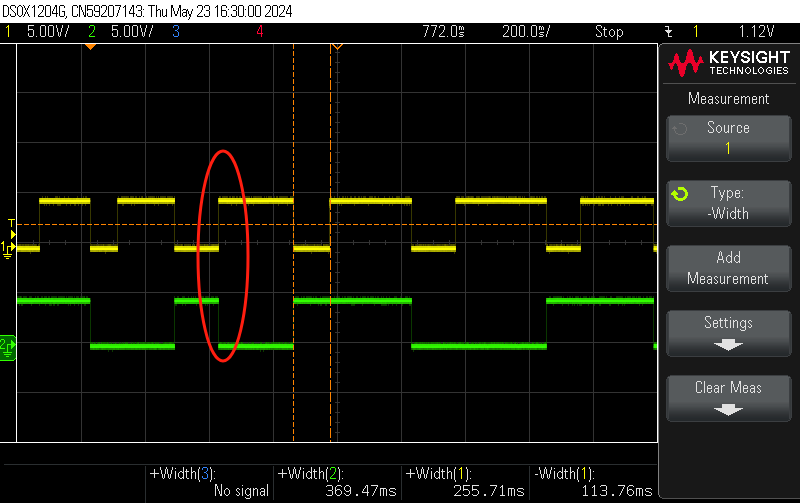
From the oscilloscope (1=button input, 2=led output), we can see that there is a false detect which happens on the rising edge on the push button. This is not correct because in the code I am using the falling edge as the interrupt source.

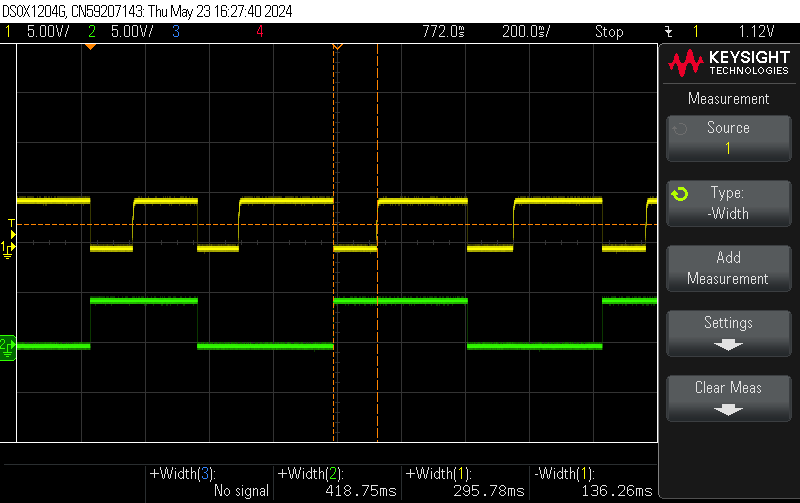
Then I build the debouncing circuit using the values above, and it looks good 👍.

Software Solution: Debouncing using Arduino/ESP Library Button2
Debouncing can be also taken care by code. One library I find very useful and is still actively maintained is Button2. It is very easy to use, and provides a bunch of button actions such as single, double, triple and long clicks, etc.. It handles the button deboucning by default and the deboucing timeout can be set by user.
Below is the code I tested with the same hardware setup:
/**
 * @file main.cpp
 * @author Zhangshun Lu
 * @brief A simple I/O test. Once the tacticle switch is pressed, the LED will change the led_state. The example is using interrupt to detect button input. The example is tested on Seeeduino Nano board.
 *
 * @version 0.1
 * @date 2024-05-23
 *
 * @copyright Copyright (c) 2024
 *
 */

#include <Arduino.h>
#include <Button2.h>

#define PIN_BTN 3
#define PIN_LED_R 10

Button2 btn = Button2(PIN_BTN); /* default is pull-up */

volatile byte led_state = LOW;
volatile bool btn_pressed = false;
volatile int count = 0; /* counter for button press */

void blink(Button2 &btn);

void setup()
{
  Serial.begin(9600);

  pinMode(PIN_LED_R, OUTPUT);

  digitalWrite(PIN_LED_R, LOW);

  btn.setDebounceTime(20); /* set debounce time to 20ms */

  btn.setClickHandler(blink);
}

void loop()
{
  btn.loop(); /* required to make the Button2 class work */

  if ((count > 0) && (btn_pressed == true))
  {
    Serial.println("Button pressed; Count: " + String(count) +
                   "; BTN_DEBOUNCE_MS: " + String(btn.getDebounceTime()));
  }

  btn_pressed = false;
}

/**
 * @brief Event handler for button click event.
 *
 */
void blink(Button2 &btn)
{
  led_state = !led_state;
  digitalWrite(PIN_LED_R, led_state);

  count++;
  btn_pressed = true;
}
The debugging message from serial monitor and the LED action by button press indicate that this library resolves the “button bouncing” effect nicely. For Arduino/ESP projects involved with button interface, this library is versatile and recommended.