STM32 Dev Setup (feat. VSCode + STM32 VS Code Extension)
Earlier I have written a post about using the Keil Assistant extension in VS Code to set up the development environment for STM32. The configuration is easy to accomplish and it uses the ARM Clang complier, which is very effient. However, there are two things that are not convenient:
- For commericial use, you have to afford a license for Keil.
- To debug the program, you have to switch back to Keil.
In this post, I am going to introduce a new toolchain. That is using the STM32 VS Code Extension to realize the tasks of edit, build and debug only in VS Code.
Let’s get started!
Steps
- Install the STM32 VS Code Extension plugin in VSCode. You also have to install STM32 CubeMX and STM32CubeCLT.
- Go to the settings of STM32 VS Code Extension, update the path of STM32CubeCLT and STM32CubeMX.
- Install the Arm GNU Toolchain and add to the system path.
-
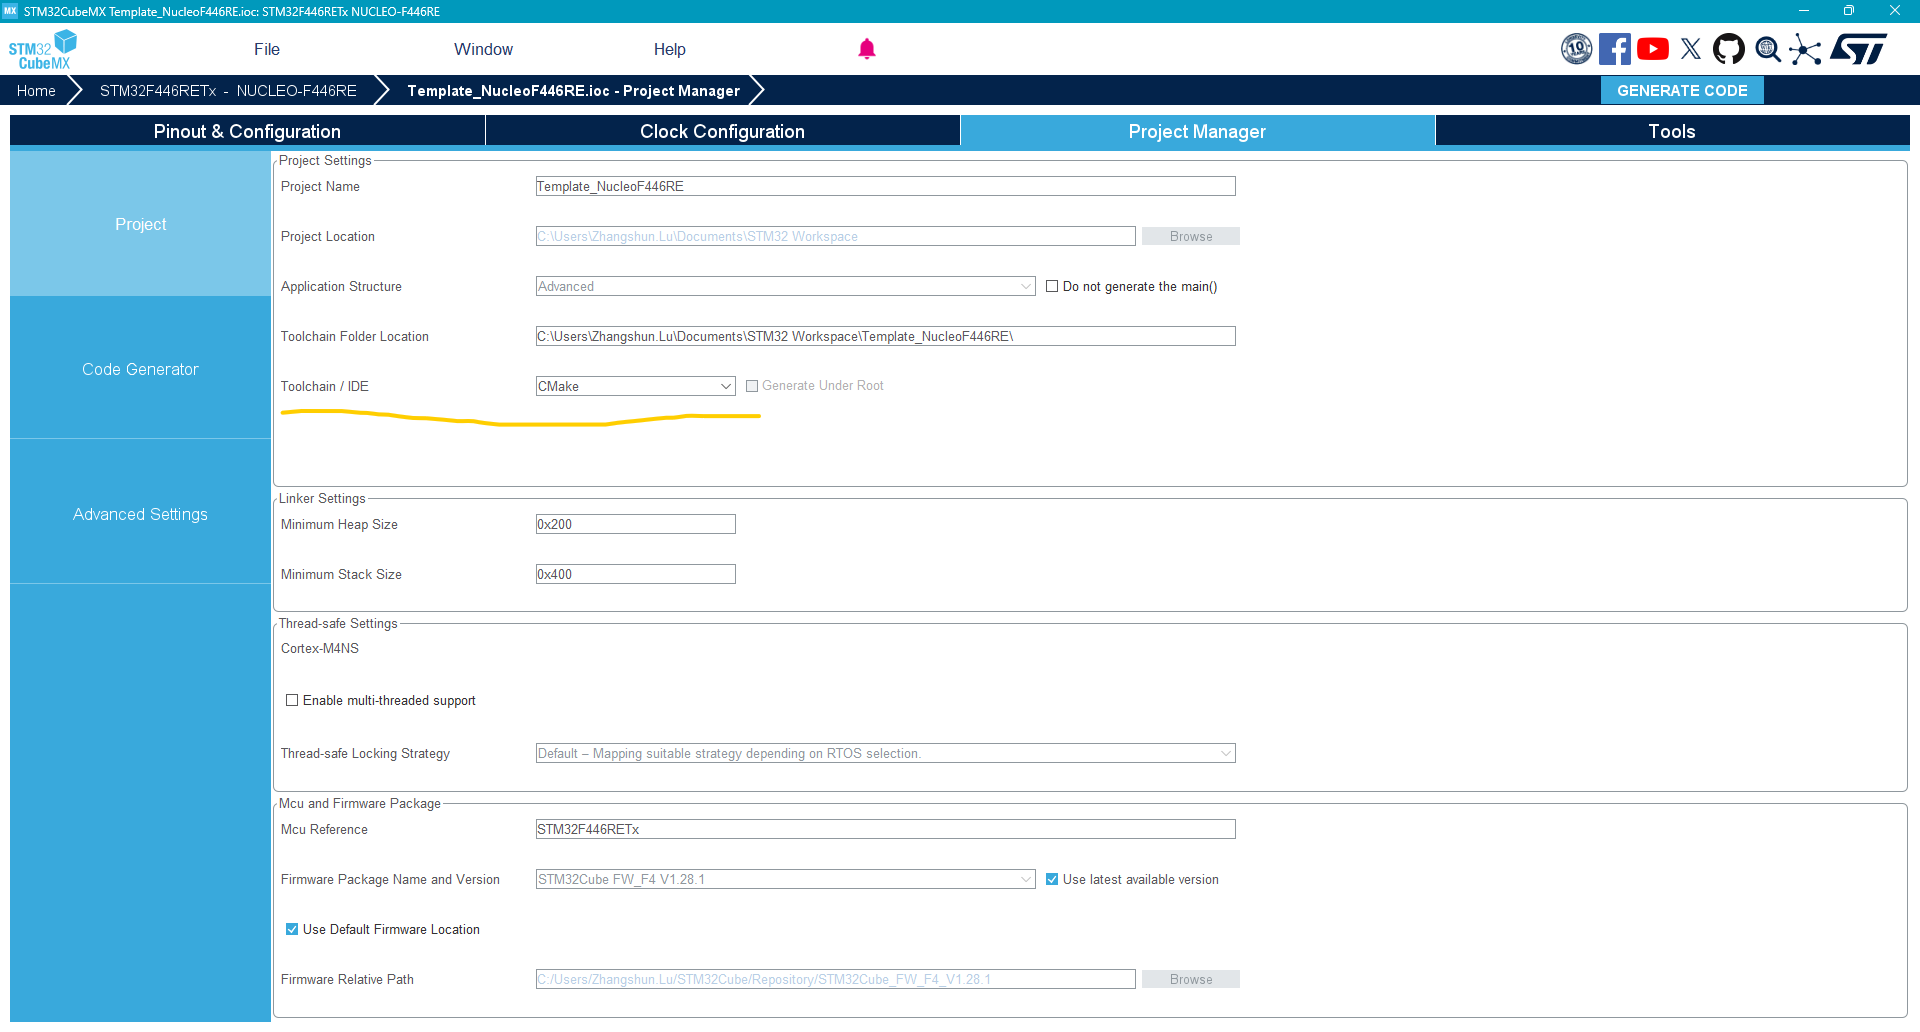
Use STM32 CubeMX to create a new project, configure MCU whatever you wish. IMPORTANT! Set the Toolchain/IDE to CMake.

Create a new project from STM32 CubeMX - Next, open the STM32 VS Code Extension in VS Code, and import the project.
-
Now, you can call
CMake:Buildto compile the program. Of course, the CMake Tools extension has to be installed.
Build the project -
The default debug settings is to use the ST-Link debugger. Sending
Stlinkupgradein the terminal to ensure the stlink firmware is up to date.
Debug the project
Summary
Using the STM32 VS Code Extension offers several benefits:
- It leverages VS Code’s IntelliSense for advanced code suggestions and navigation.
- It enables seamless debugging using OpenOCD, ST-Link, or Segger J-Link.
- It is cross-platform supported. Which unlike Keil or STM32 CubeIDE has limitted support.